Introduction
This tutorial will demonstrate how to install WordPress on a Red Hat Enterprise Linux derived system. In this example I will be using Oracle Linux 9 since I have the ISO downloaded already. I will be using Apache web server and MySQL which is an Oracle product. Normally I would not recommend either Oracle Linux or MySQL but am using them here to demonstrate any differences I encounter in the configuration. I would normally recommend Red Hat Enterprise Linux which is free with a developer subscription, AlmaLinux, Rocky Linux or other non Oracle Enterprise Linux derivatives. For the database I normally recommend MariaDB which works with the MySQL commands.
SELinux will be enforcing throughout; there’s not much point in Enterprise Linux if you’re just turning off its flagship features!
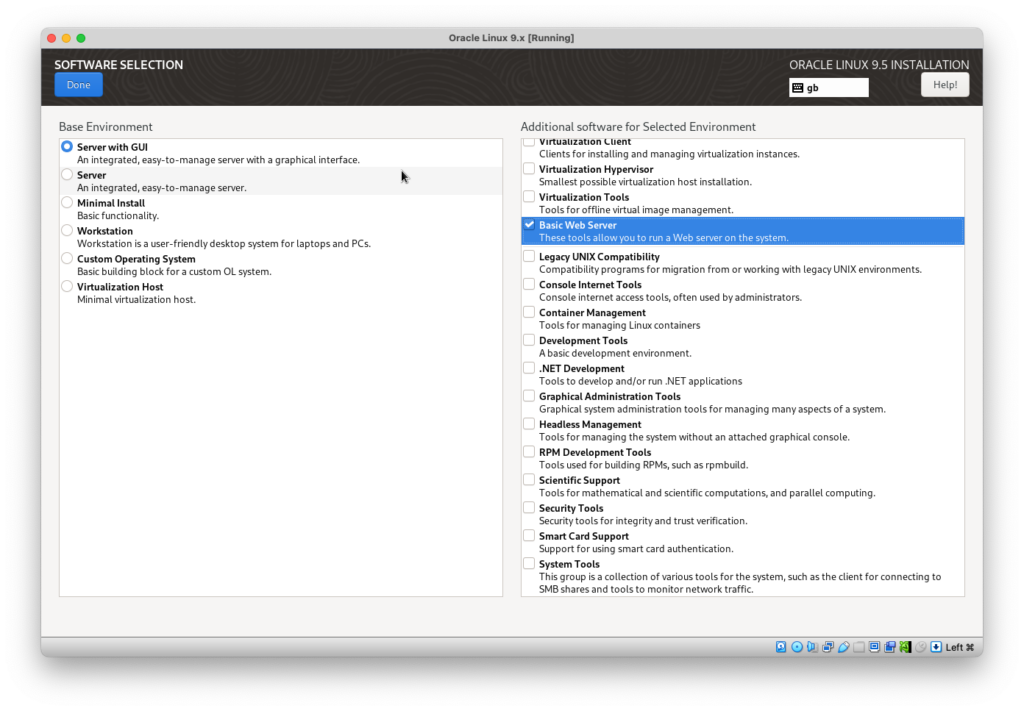
To follow along with this tutorial install your Enterprise Linux distribution somewhere like a free cloud provider, virtual machine or spare computer you have connected to your network. Do a Server Installation with or without GUI, select “Basic Web Server”, add a user account and set a root password. It would be ideal to have SSH access to the machine but you can also work entirely in a graphical virtual machine: on a production server the GUI is a waste of resources so don’t install it.
Keeping Safe
It is best to keep the server closed to the internet initially and only opening it up once the site and database are connected. If you are on a local network behind NAT just keep port forwarding off until you’re ready to setup SSL certificates. Please note that the MySQL root password should not match the system root password for extra security:
Example Details
| Domain name: | fatlarry.net |
| MySQL root password: | df$3dFg^5g5Y4 |
| Database name: | netzoom |
| Database username: | thinsiteadmin |
| Database password: | 54GTdef^$432 |
| Database prefix: | rb_ |
DNS Setup
For the web server to return our site properly we need name based resolution which for a production server would be set by your domain/DNS service provider. For local networks some routers can bind a FQDN to a machine on your network, or if this isn’t an option we can temporarily set a computer to resolve the domain name to the server, or the server itself in the following example.
vim /etc/hosts127.0.0.1 fatlarry.net localhost localhost.localdomain localhost4 localhost4.localdomain4
::1 localhost localhost.localdomain localhost6 localhost6.localdomain6…or here’s an example of using another machine, in this case running macOS:
##
# Host Database
#
# localhost is used to configure the loopback interface
# when the system is booting.  Do not change this entry.
##
127.0.0.1	localhost
255.255.255.255	broadcasthost
::1             localhost
10.0.1.19	fatlarry.net
With that done check that your machine resolves fatlarry.net with:
ping fatlarry.net
64 bytes from fatlarry.net (127.0.0.1): icmp_seq=1 ttl=64 time=0.030 ms
On this example Server with GUI we will be able to connect our WordPress site to the database and secure it all in privacy. Once we’re done we can return to the /etc/hosts file and remove our override.
Installing Requirements & Optimisations
You will find a number of tutorials on how to setup WordPress on Enterprise Linux which will suggest a set of packages that will allow WordPress to run; however in my experience only the basics will result in higher system resource usage and WordPress reporting less than perfect site health. The following should get WordPress running efficiently with a full feature set.
If you did not install the “Basic Web Server” whilst installing your Enterprise Linux distribution do so now:
dnf group install "Basic Web Server"We will need to enable Extra Packages for Enterprise Linux (EPEL) as this contains imagick which is used for efficient image processing in WordPress. The previous link gives instructions on how to enable EPEL in most Enterprise Linux distributions, however if your choice is different as is the case in this Oracle Linux 9 example you need to identify how to enable the codeready-builder so:
dnf repolist --all |grep CodeReady
ol9_codeready_builder      Oracle Linux 9 CodeReady Builder (x86_64) -  disabled
dnf config-manager --enable ol9_codeready_builder…then as instructed for EPEL install the release package which in this example is:
dnf install https://dl.fedoraproject.org/pub/epel/epel-release-latest-9.noarch.rpmNow it’s time to install the WordPress dependencies and optimisations. Highlighted red is the database I’m using in this example, and in green is the package I would normally use instead. Also note that telnet is only installed to test a service we are going to enable:
dnf install mysql-server mariadb-server memcached telnet php-mysqlnd php-fpm php-json php-pecl-zip php-gd php-pecl-imagick php-intl php-mbstring php-xml php-pecl-memcacheConfigure and Start Services
Memcached
Memcached should be configured to listen to the localhost on the loopback interfaces only and you can confirm this with:
cat /etc/sysconfig/memcachedPORT="11211"
USER="memcached"
MAXCONN="1024"
CACHESIZE="64"
OPTIONS="-l 127.0.0.1,::1"We can start and enable memcached with:
systemctl enable memcached --now…then test it with:
telnet localhost 11211quitMySQL / MariaDB
We must secure our SQL installation then create the database that WordPress will connect to. To start and secure the MySQL server run the following and go through the prompts: the red is for MySQL and green for MariaDB (recommended):
systemctl enable mysqld --now
systemctl enable mariadb --now
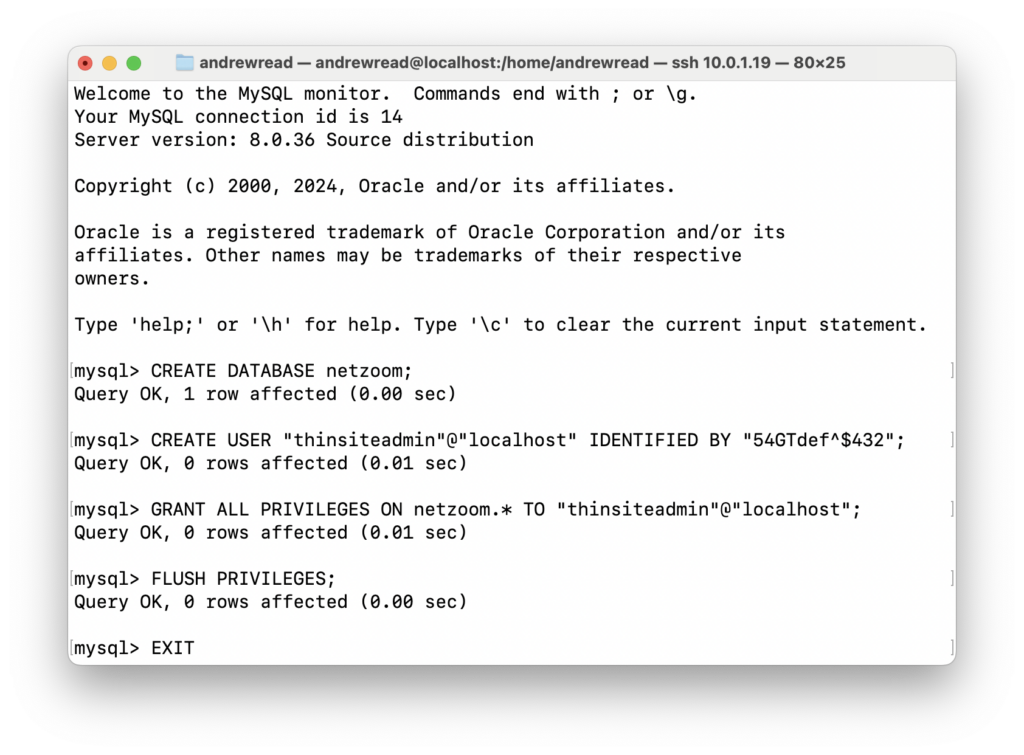
mysql_secure_installationNow to create the WordPress database with the Example Details:
mysql -u root -p
Enter password: df$3dFg^5g5Y4
At the MySQL prompt it should be populated for this example by:
httpd
Now let’s systematically get httpd running; so we’ll start by loading the servers test page before adding virtual host configuration. Although we could just replace the servers website files I prefer to use a virtual host as this allows easier backups and upgrades of the httpd.conf files.
systemctl enable httpd --now
curl 127.0.0.1
If the curl command displayed some markup then the server is running. If you have the GUI installed you could load Firefox and navigate to 127.0.0.1 . At this stage the firewall does not allow external connections which is by intention as we setup the WordPress site in an isolated environment until ready to go on the web.
Getting WordPress
We’ll now download the latest version of WordPress and configure the web server to host it. I recommend working in the /var/www directory as this is where SELinux expects to find webpages, and it may block websites stored in other locations for example: /srv/www .
cd /var/www
wget https://wordpress.org/latest.tar.gz
mkdir fatlarry.net
tar -xvzf latest.tar.gz -C fatlarry.net --strip-components 1
chown -R apache:apache fatlarry.net
I now recommend creating the virtual host file which will be loaded with httpd; although Red Hat suggests appending this to /etc/httpd/conf/httpd.conf I recommend having a separate site configuration file in /etc/httpd/conf.d to reduce a risk of overwrite during a server upgrade:
vim /etc/httpd/conf.d/fatlarry.net.conf<VirtualHost *:80>
DocumentRoot /var/www/fatlarry.net
ServerName fatlarry.net
<Directory /var/www/fatlarry.net>
Options FollowSymLinks
AllowOverride All
DirectoryIndex index.php
Require all granted
</Directory>
<Directory /var/www/fatlarry.net/wp-content>
Options FollowSymLinks
Require all granted
</Directory>
</VirtualHost>service httpd restartYou can now verify the virtual host configuration by checking that you get Location: http://fatlarry.net/wp-admin/setup-config.php from the following command:
curl -I localhostConnecting Securely to WordPress
We will need to set some SELinux policies as Enterprise Linux has hardened security that goes beyond simple file permissions. You may read tutorials that tell you to enable “permissive” mode, however you loose many of the security advantages of Enterprise Linux in doing so. Here’s how to set things up properly:
setsebool -P httpd_unified 1
setsebool -P httpd_can_network_connect 1
If you are using a GUI on the server you can connect to the WordPress setup page using Firefox on the server: just load localhost . If your server does not have a GUI we can port forward with ssh through the firewall and configure from any machine that can connect to the server. Here’s what I did on my Mac:
ssh -L 8080:10.0.1.19:80 andrewread@10.0.1.19I was able to load the Welcome to WordPress screen from Safari by navigating to: localhost:8080 .
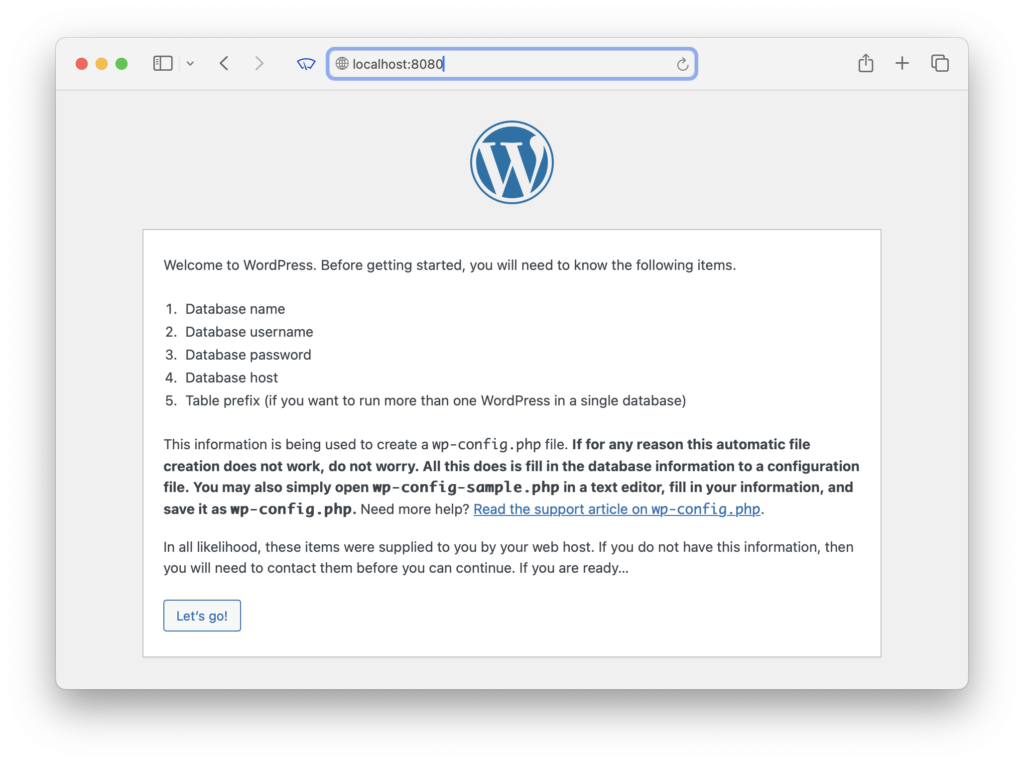
Click “Let’s go!” then proceed with database connection using the Example Details :
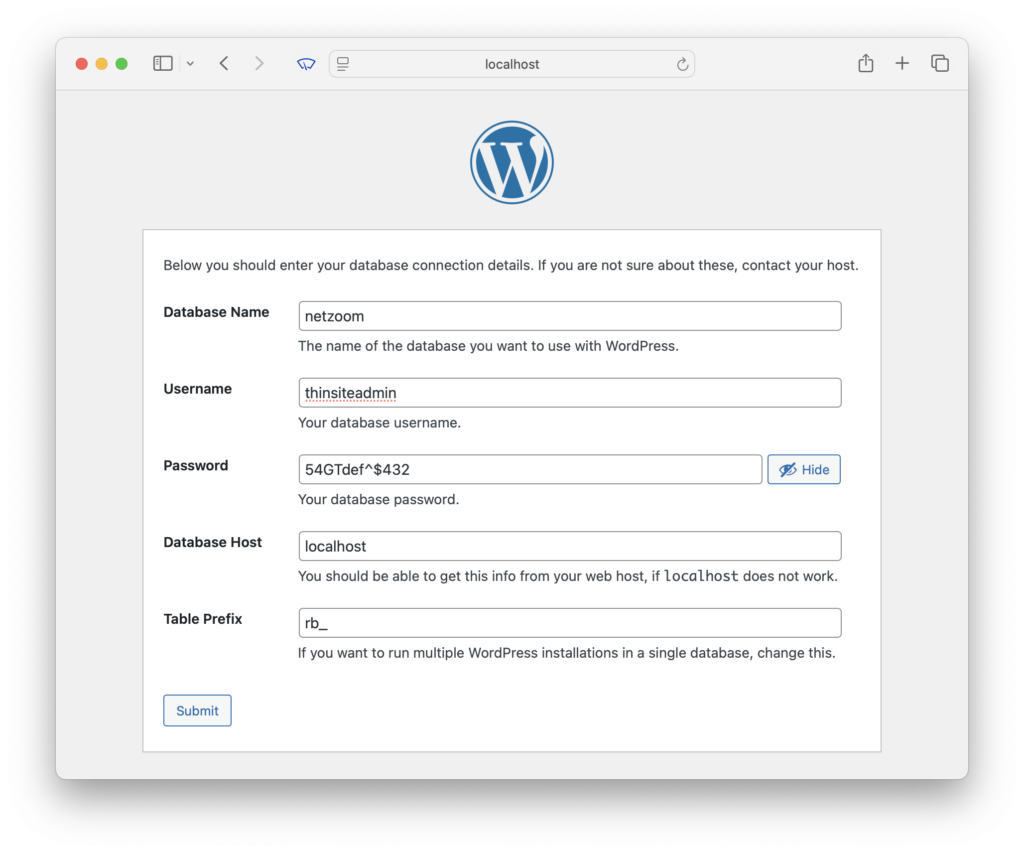
You will then be prompted for some login details for the new WordPress site so go ahead with this and set a secure password.
Having setup the site on http://localhost:8080 we now need to correct these values in the WordPress settings page for the site to work normally. Below is an example of how to set this site for real world use with an https address: do not do this if you are following along in this tutorial as you will not be able to obtain the SSL certificate: instead set it to http://fatlarry.net
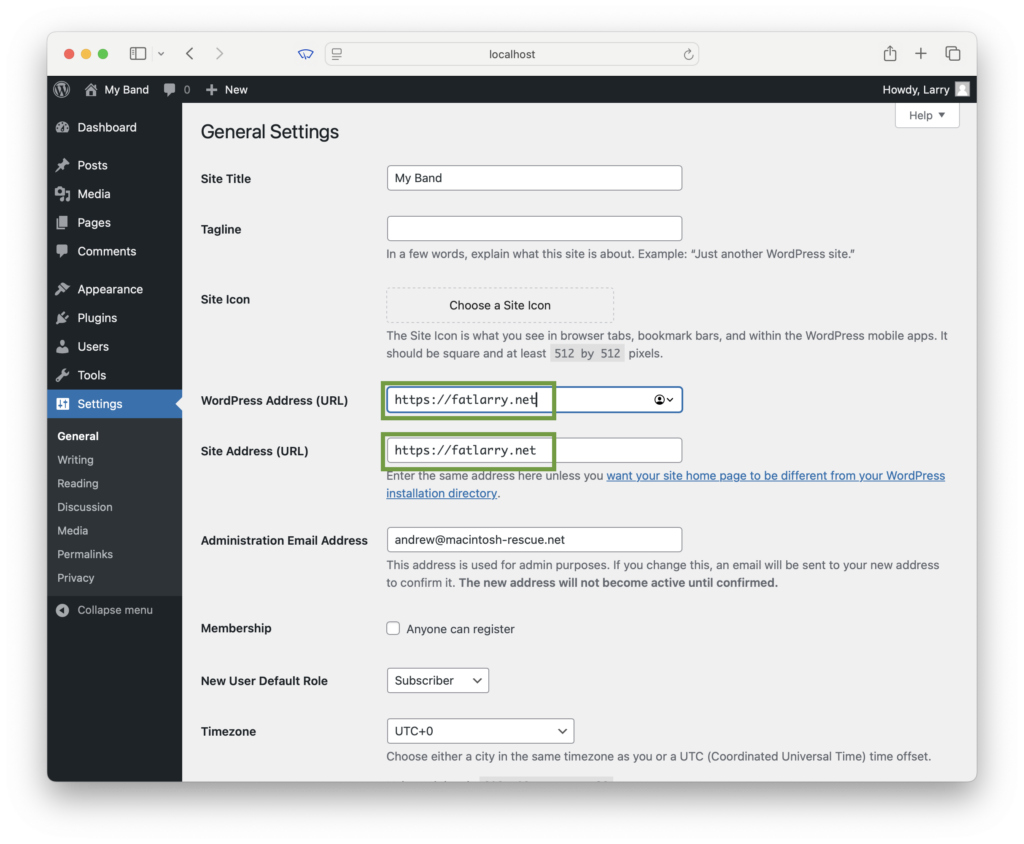
Scroll down and click “Save Changes”: this will break your connection to the site as expected behaviour.
Make Available on the Web
Now that WordPress is configured we can now open up to the World Wide Web and get an SSL certificate. If you need to setup port forwarding on your router or cloud provider now is the time to do it: you need ports 80 and 443 .
Setting up the firewall is done by:
firewall-cmd --permanent --zone=public --add-service=http
firewall-cmd --permanent --zone=public --add-service=https
firewall-cmd --reload
To continue working on the site we need to obtain an SSL certificate which can be done with certbot. Instructions on how to get this working follow the instructions from EFF , or use the version of certbot available through EPEL :
dnf install certbot
certbot
…then follow instructions.
Finishing Off
We can now point a browser to fatlarry.net/wp-admin to do some final activities to optimise the site:
On the WordPress side menu select “Tools” and “Site Health”:
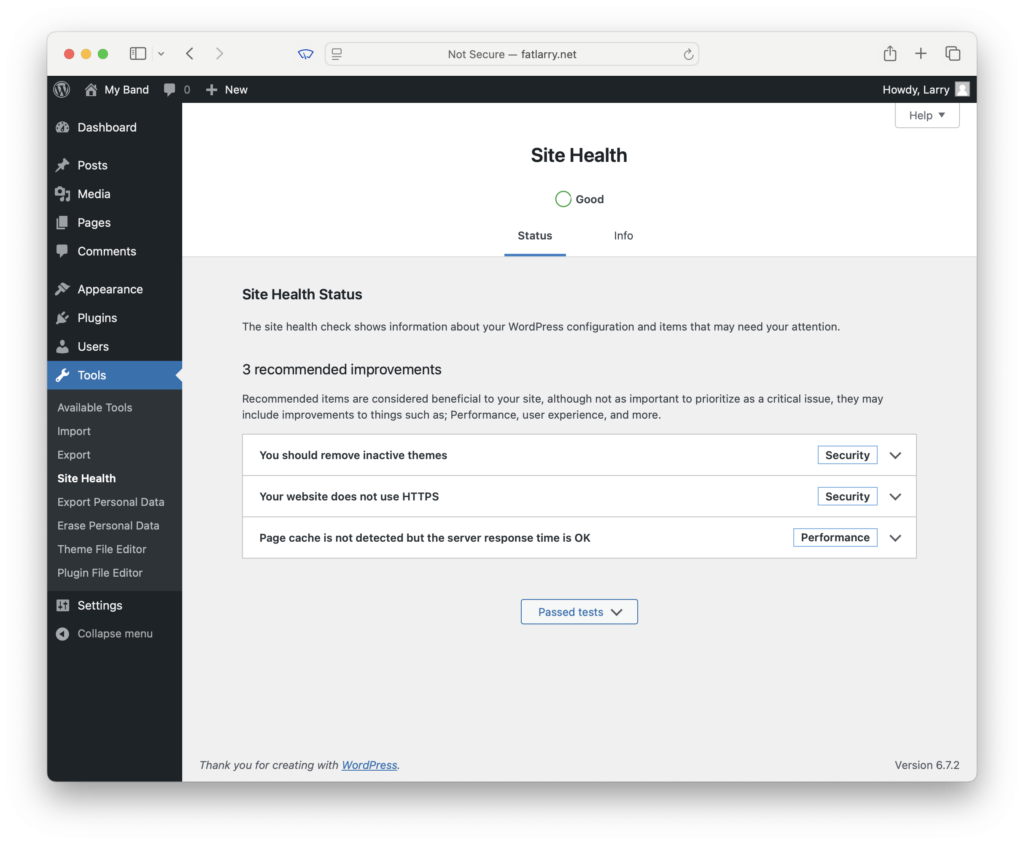
There are a few recommendations to work through here, however we cannot resolve “Your website does not use HTTPS” in this tutorial as this involves obtaining an SSL certificate which certbot can do automatically for any web accessible services you install WordPress on. Let’s first address “You should remove inactive themes”:
- On the side menu select “Appearance” then “Themes”
- Click an inactive theme then “Delete” from below the description
- Do the same for all inactive themes
Going back to “Tools” “Site Health” the recommendation should be gone. We now need to setup “Page cache” which is what we are going to to use Memcached with:
- On the side menu select “Plugins” “Add New Plugin”
- Search for W3 Total Cache
- Click “Install Now” once you’ve found it
- Click “Plugins” on the side menu then “Activate” the W3 Total Cache plugin
- Click “Settings”
- Skip the Setup Guide then enable Page and Object Cache at least and set them to “Memcached”
- Enable Browser Cache
You can now go back to Site Health and should on a production server one HTTPS there should be no further recommendations.
Conclusion
I tested the above on Oracle Linux 9 and will endeavour to keep up to date with changes in newer Enterprise Linux distributions, most likely CentOS Stream 10 next. The above might also work with Fedora so if you give it a go I’d be interested to hear how you get on, just leave a comment.
I found that there are complications when moving an existing WordPress instance and that is documented here.
Good luck getting your WordPress site running on Enterprise Linux!