I was recently planning to propose a method to connect a church community who’d been meeting purely via Zoom seemingly interested in returning to in-person activities whilst keeping remote participants engaged. Over the last 18 months distance has ceased to be the defining factor in the formation of communities thanks to internet connectivity. People from around the world connected to distant and local groups, and became our friends and now we have the challenge of keeping those new connections as we consider returning to the places we used to gather. Sadly I never put my system into action due to my objections to a culture of homophobia and bullying at the Unitarian church I was previously engaged with. I’m documenting this now as I may use this system again in other settings, and it’s a nice example of what you can do with old computers.
Considderations
This is an audio visual experience so there are audio visual sources to be managed and this can either be done with software or hardware style mixers. My preference is for a single audio input into a directors computer from a mixer with volume sliders for individual microphones and other sources to be mixed into the remote experience. I also favour a hardware volume control outputting the computer (remote participants audio) into an existing PA or AV system which may be linked into accessibility equipment for example hearing aid loops. The approach of using hardware rather than software mixers simplifies the the main computer that is being used to direct the integrated experience.
It is important that everybody in the community know that they are together so I recommend the setup of a large screen either projection or otherwise which will show a grid of all remote participants. I also recommend the consideration of walk up displays allowing socialisation opportunities, or the ability to have remote participants sitting around a meeting table. This tutorial offers a system to achieve this.
Perquisites
A desktop computer is needed for an integration facilitator to manage the online meeting space and manage the other screens. I recommend a Mac or Linux computer for this purpose since it is important to have control over software update mechanisms and not be interrupted by forced reboots during a session.
Screens and audio cables will be required as per venue but the extra computing needs are minimal:
A single computer with sufficient graphical power could potentially run the lot utilising fullscreen virtual machines on other displays with cameras attached to the virtual machines with hardware pass-through. The Virtual machines can be managed via remote access software since they may not be visible depending on the location of the additional screens. External physical machines driving displays and cameras can be managed in exactly the same manner and may be easier to install.
I am recommending the use of a long term supported operating system release to ease maintenance and get the best out of available hardware. The additional systems only need basic HD video capability but little processing power, memory or storage; you could even use an old laptop with a broken screen since you’d be using an external display anyway. It is also possible to utilise Raspberry Pi’s so long as your conferencing software can run in a browser. Both Microsoft Teams and Zoom desktop clients are only available for intel and AMD compatible CPU’s so I will demonstrate an intel system.
Setting up an example machine
- Download and create installation media for Debian GNU/Lunux
- Boot your additional display machine from the Debian GNU/Linux installation media and choose the Graphical Install option: make sure you have a network connection available druring installation
- Select appropriate language and input settings
- Enter a hostname; this will be displayed on login prompts so it’s best to use something that will help you recognise the system.
- Domain name: can be set to any value but could be useful as an identifier if remotely administering the system away from the venue
- Set the root password and be sure that you will not forget it; the root password is required for system setup, configuration, software installation and updating; you can optionally disable this later and setup administrator users with sudo
- Now are prompts for a user account: it is likely that this system will only have one user and that it will likely login automatically at startup so something generic might be appropriate. In this example my users full name is “Remote Display Administrator” and username “rdadmin”
- Set a password for this account and make sure you will remember it. The password will not be used after auto login is enabled latter on and can be reset by the root user
- Let the disk partitioner setup volumes as it sees fit; there’s probably little benefit in a fancy partitioning scheme with this system
- When you get to Software selection I recommend unchecking all but standard system utilities then selecting LXDE (a very light weight desktop environment perfect for our needs) and possibly SSH Server (so that you can easily perform administration tasks like updating software from another computer)
- Continue with installing the boot loader onto the boot disk to finish the initial installation
Setting up the Desktop
With the basic system installation done it is time to configure auto login, add a graphical remote desktop connection (VNC), and install the Teams and Zoom clients.
Auto login
- Open the menu from the bottom left of the screen, go to system Preferences then LXTerminal ; this is where we’ll do most of our work and enter any commands
- enter the “su” command to gain root acess and enter the root password when prompted.
- enter
nano /etc/lightdm/lightdm.conf - delete the # symbol in front of the lines “autologin-guest=false” and “autologin-user=” following that line with the username which in this example is “rdadmin”
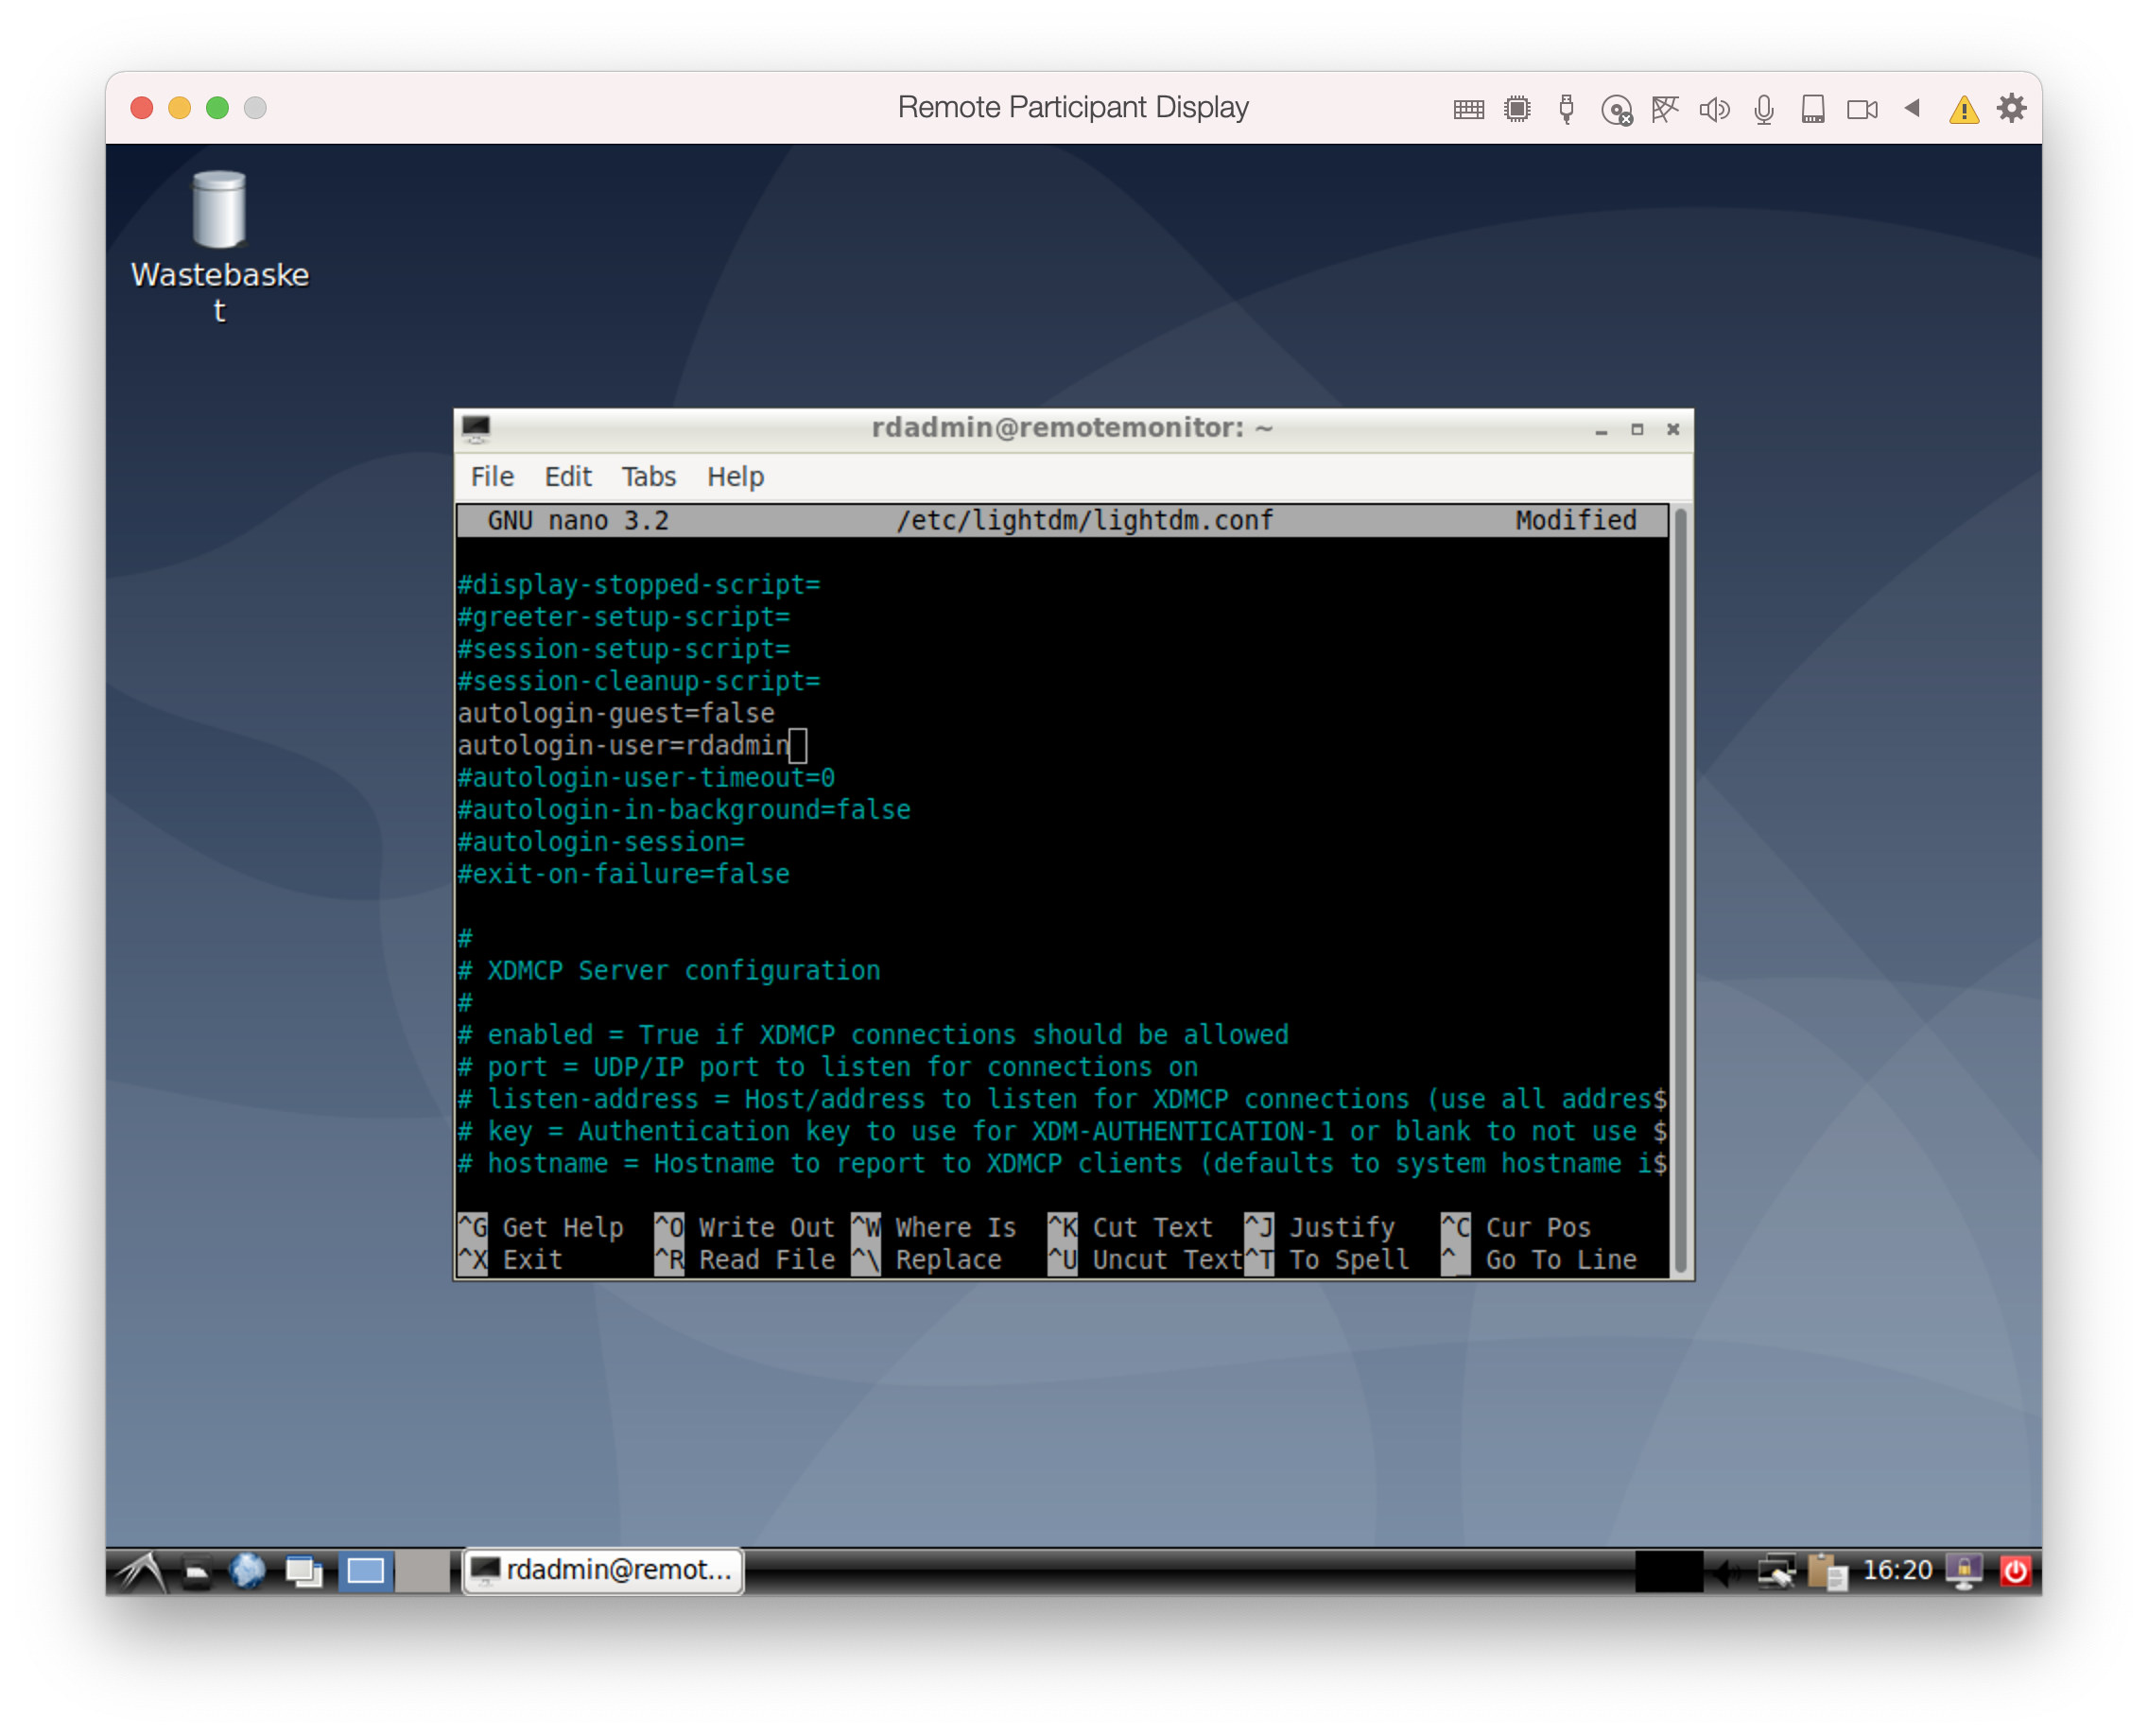
- Write Out the file “ctrt” + “O” then exit “ctrl” + “X”
- Close everything and reboot to test
VNC remote control setup:
We have to do something a little unusual here which is setup vnc access to the screen. Normally a VNC server would open an additional virtual display which would not allow us to remotely configure this screen. We can do the following to enable remote control of the physical screen:
- Open LXTerminal and change to root: su
- Enter “apt install tigervnc-scraping-server” and install the suggested packages
- logout of root “ctrl” + “D”
- Now run the command “vncpasswd” and enter a password for remote remote connections, select “n” for view-only password
- Enable the VNC server on login with
echo “x0vncserver -passwordfile /home/username/.vnc/passwd -display :0” >> ~/.config/lxsession/LXDE/autostart" - Now reboot the system to activate the configuration
- Now you need to note the system IP address which should be statically reserved on your router: just hover your cursor over the network icon on the lower right of the screen to reveal the IP address.
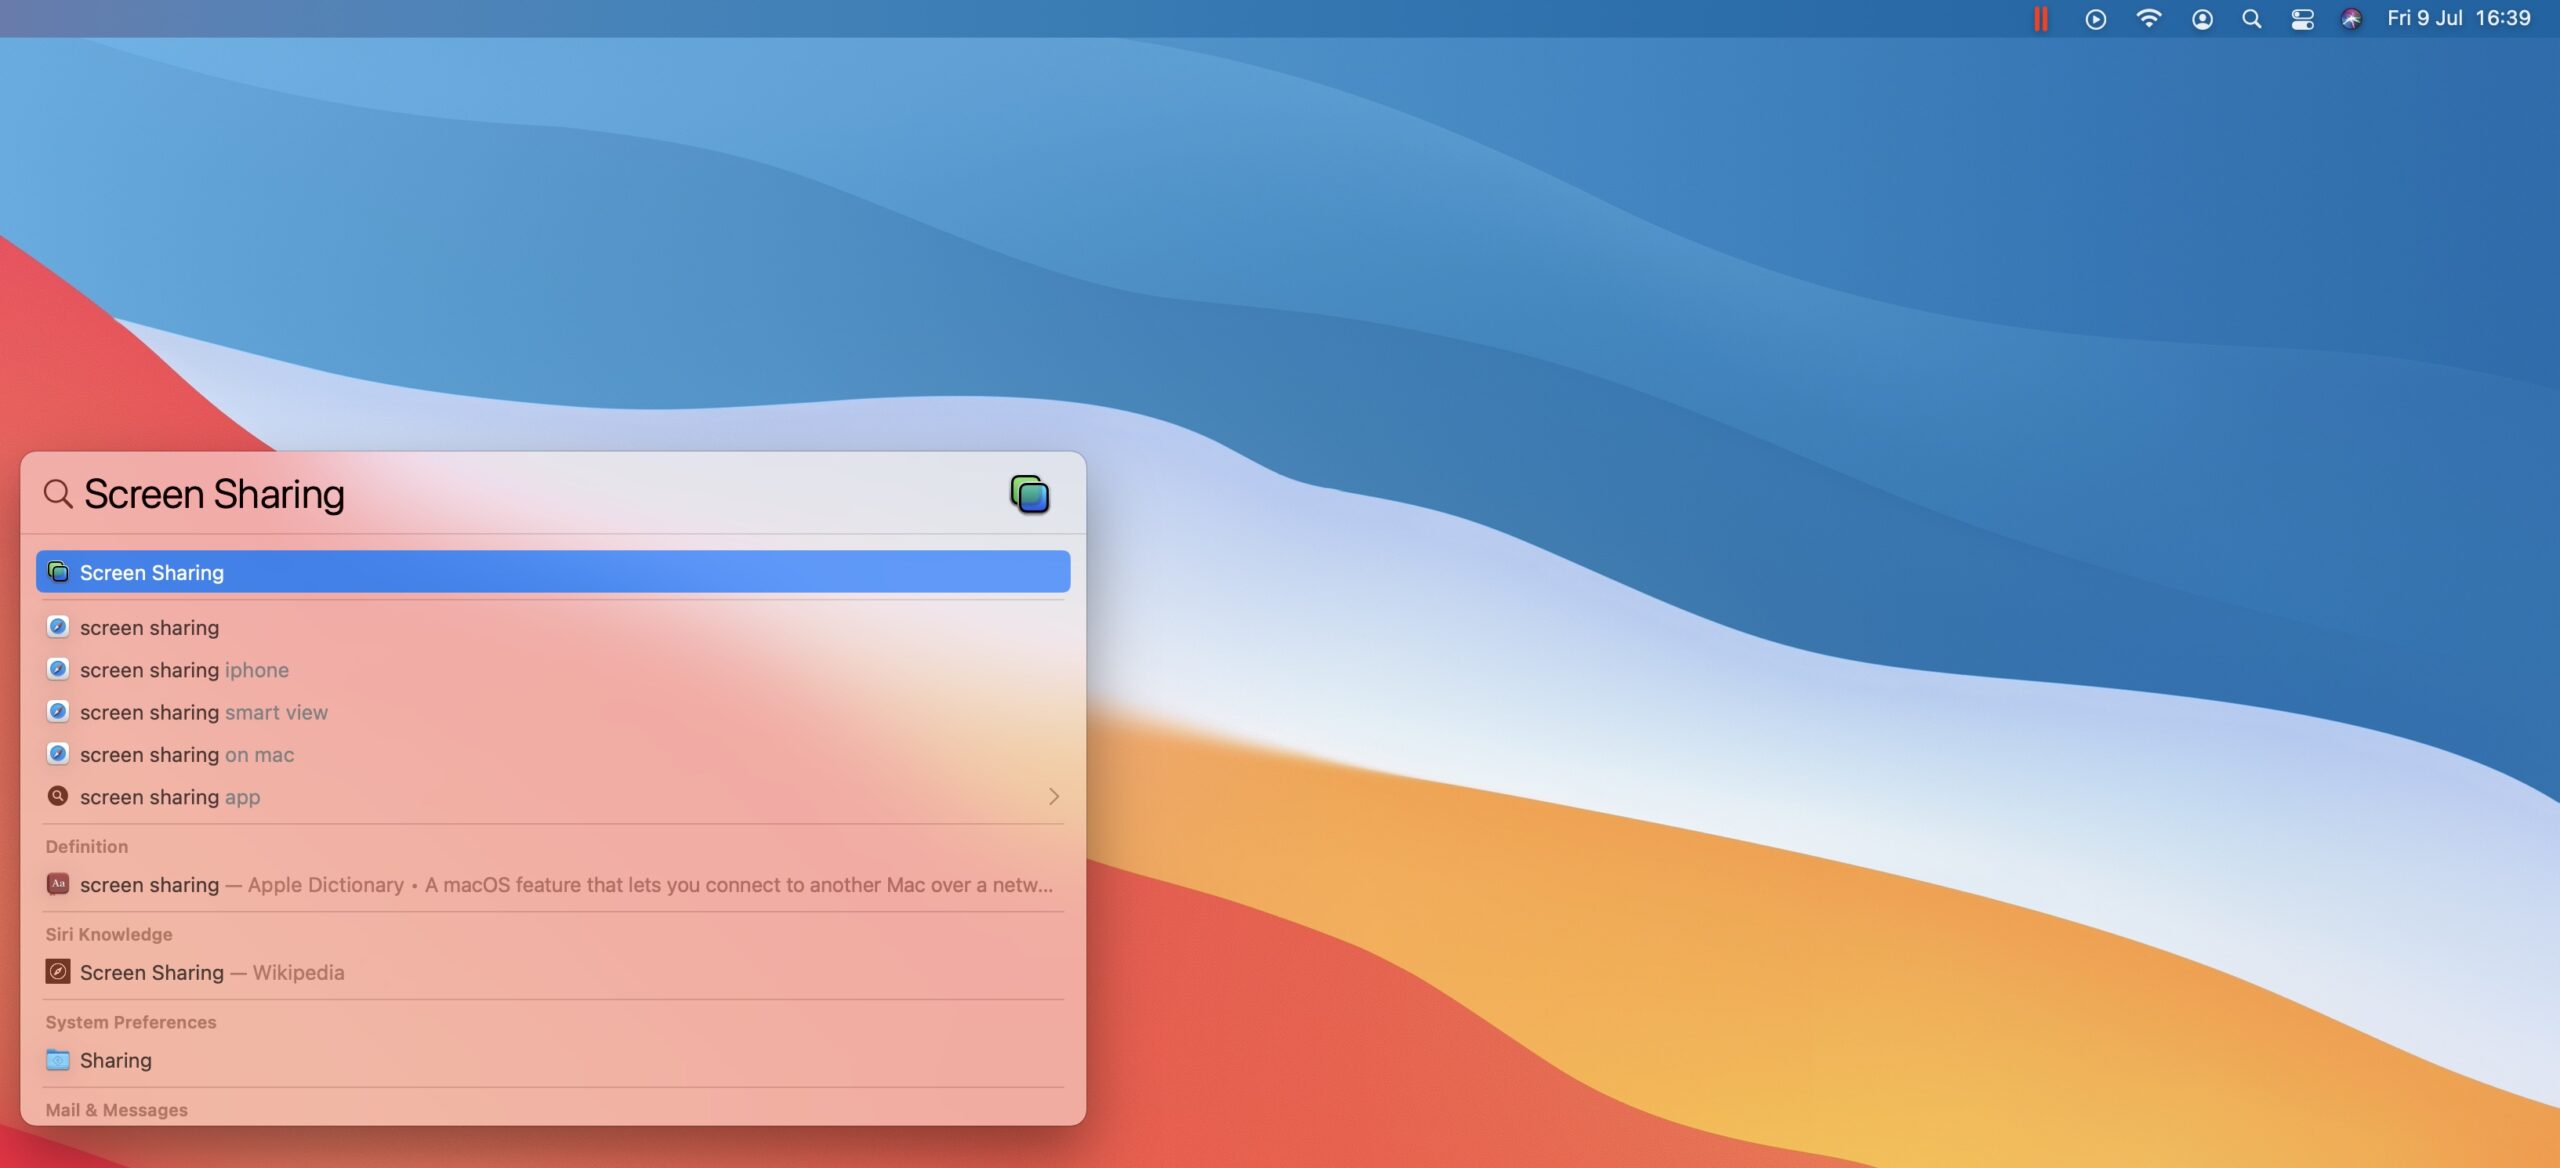
- On the main meeting management computer you now need to open a VNC client. In this example I will demonstrate the macOS included Screen Sharing client. Enter the remote display IP address and password you set
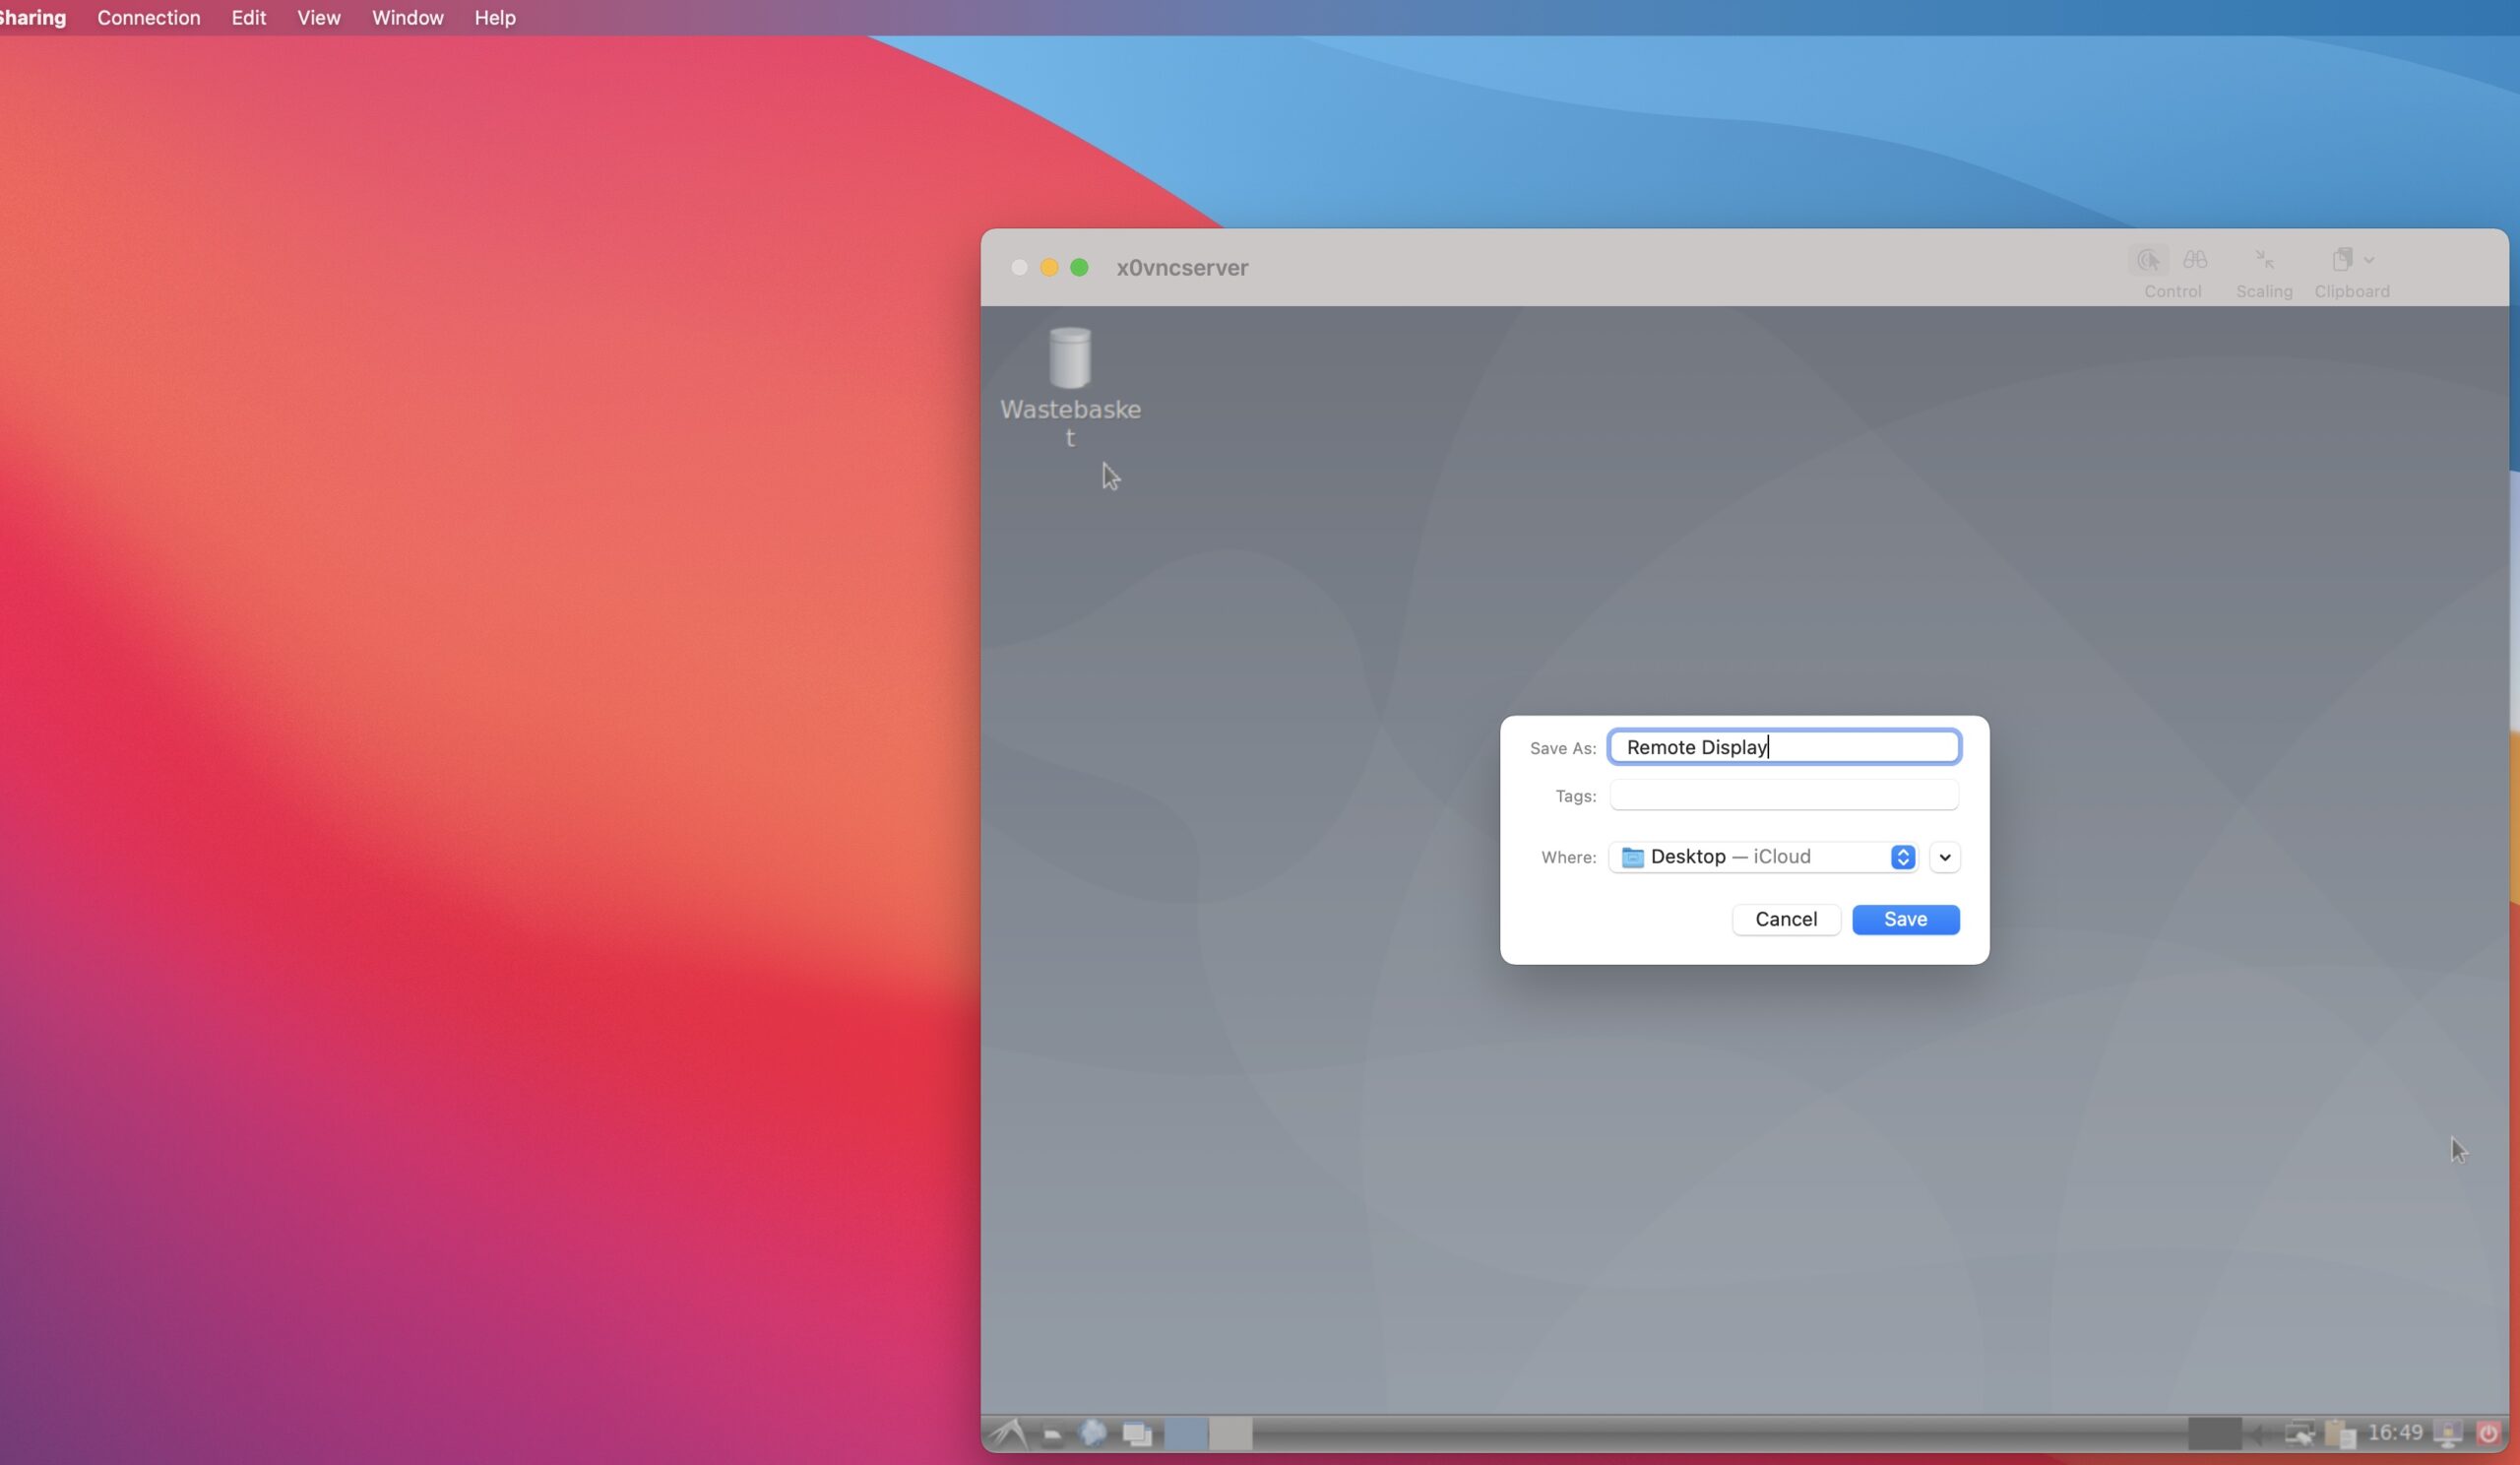
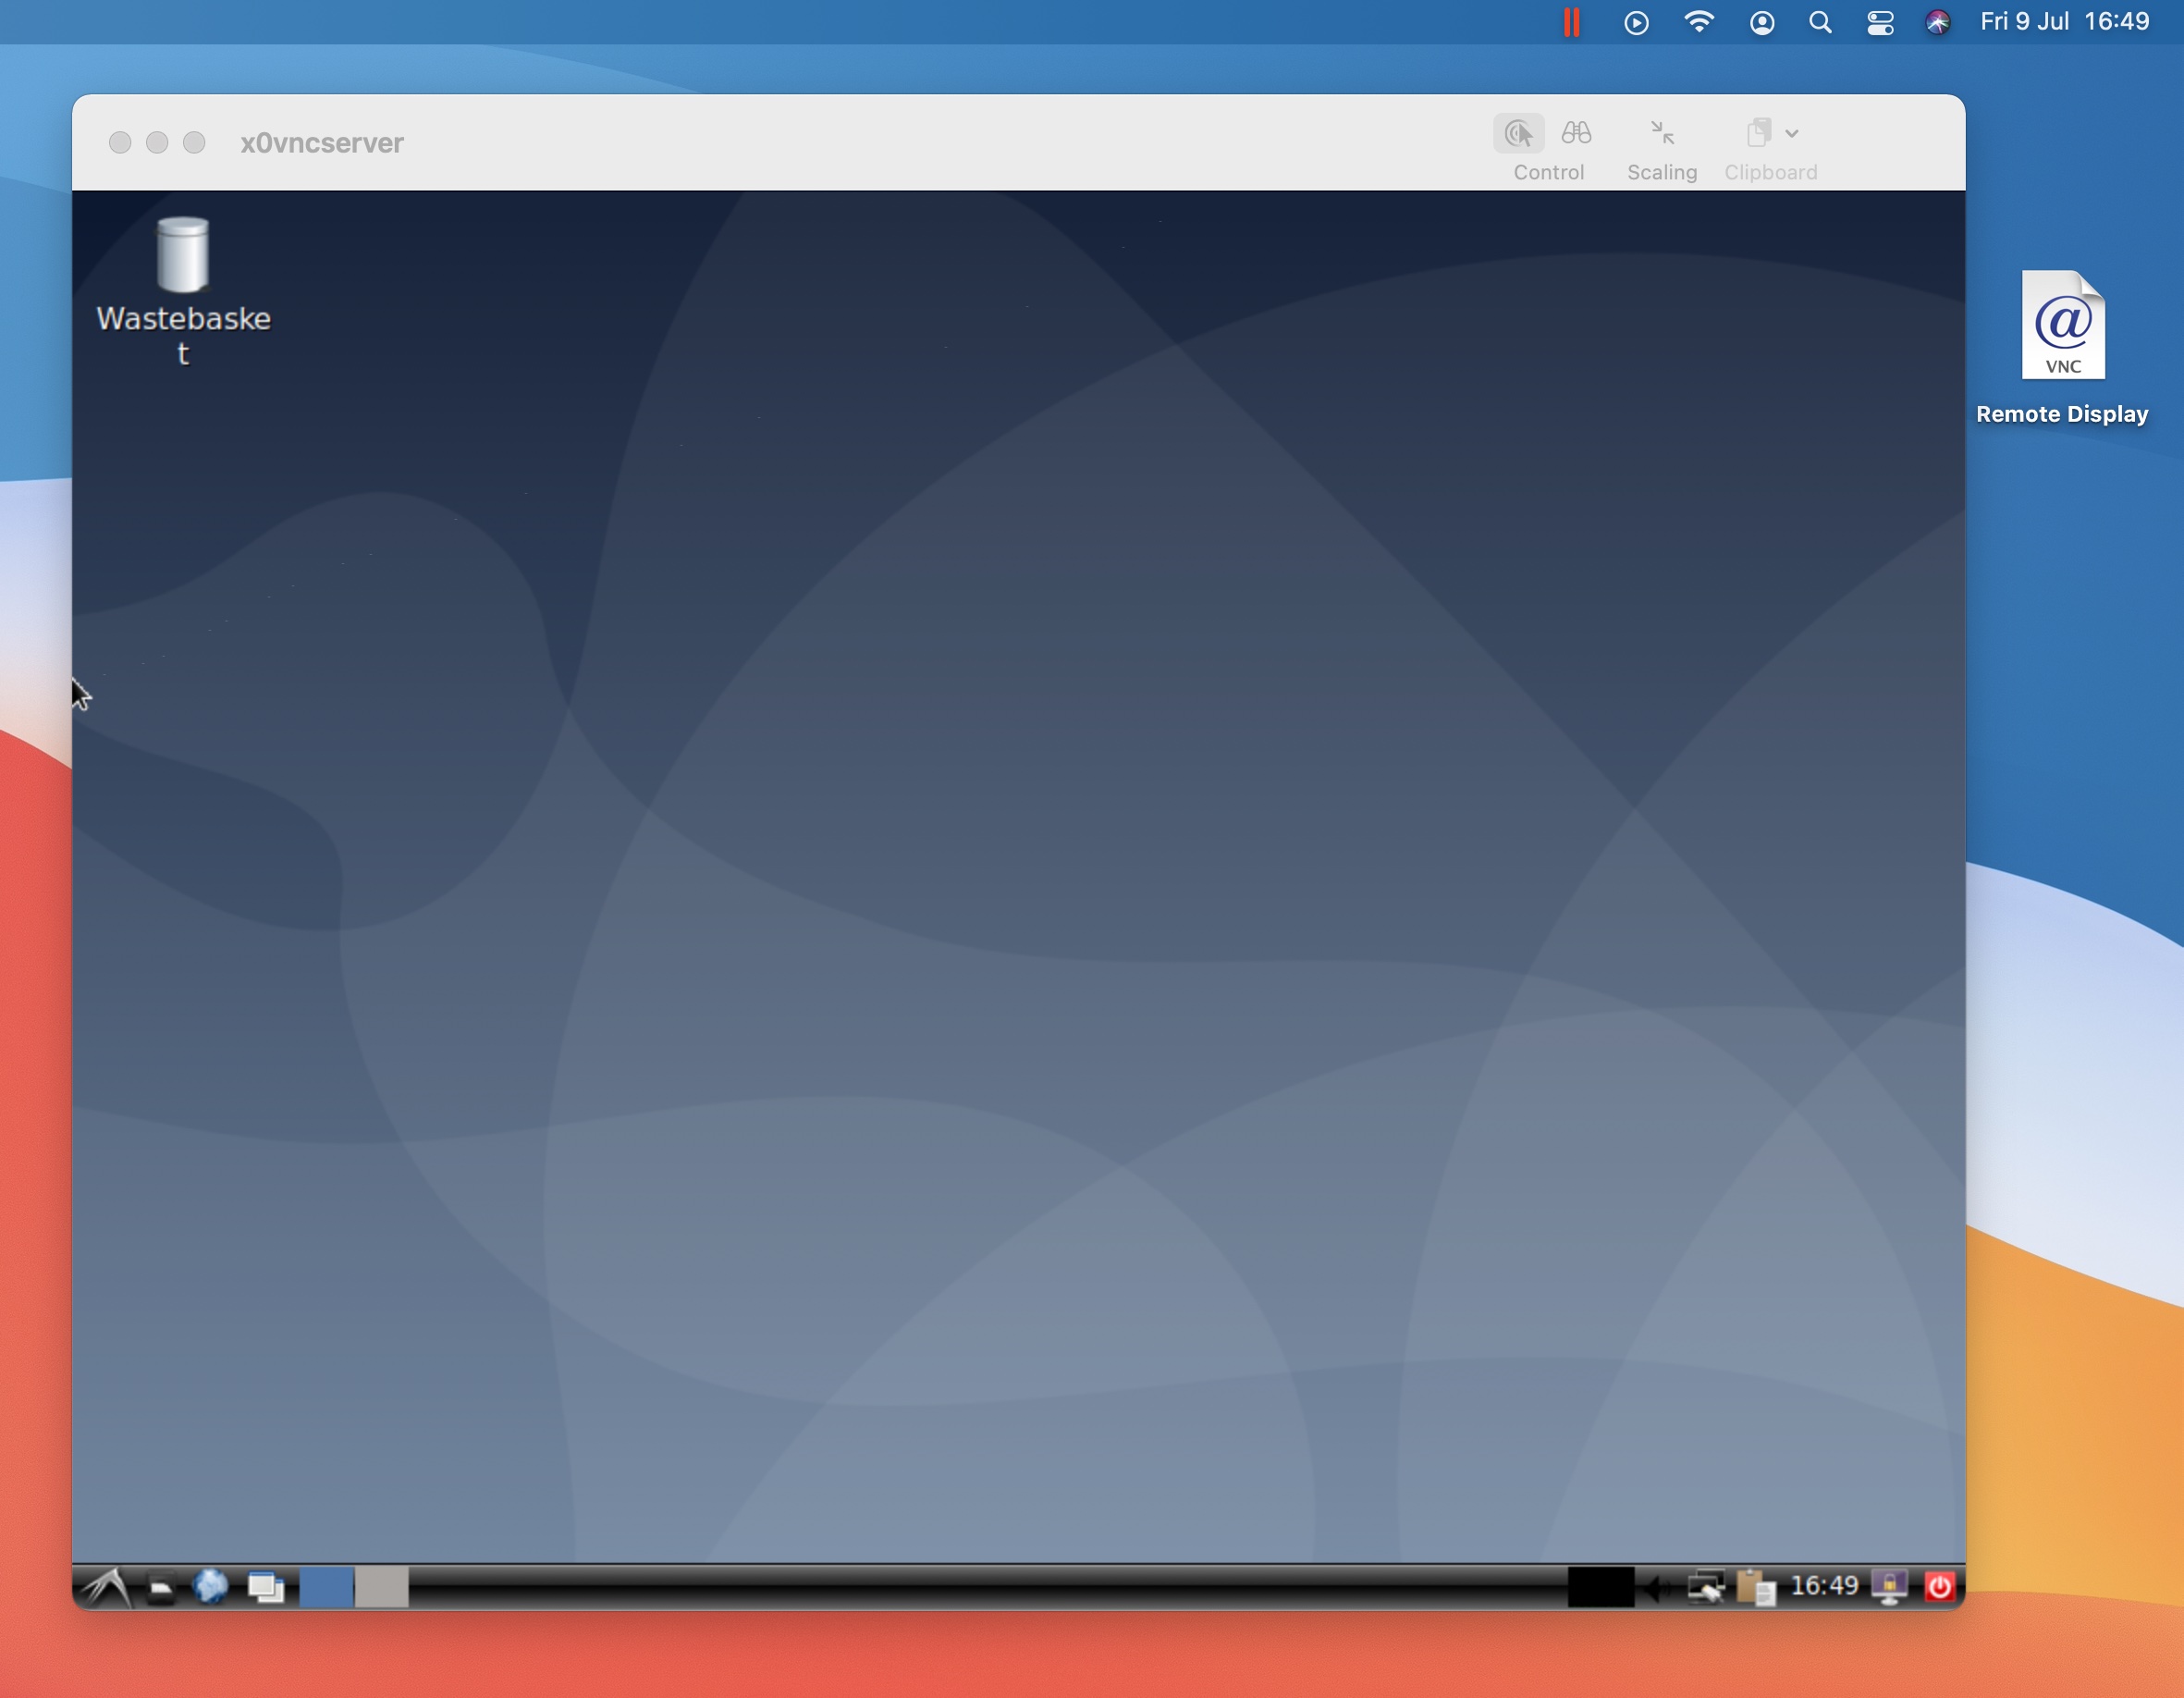
- With success you can now save that connection for future use and create a desktop shortcut if you wish from the “Connection” menu
Adding some extras
You now have the basic remotely manageable machine but if you’d like to use desktop meeting clients like those available from Microsoft and Zoom you can now download and install them inside the remote display system
- Download clients in .deb format from Microsoft or Zoom . Select “Save File” when prompted
- Go into LXTerminal, go to the Downloads folder “cd Downloads”, become root “su”
- Temporarily add some paths to the root user
export PATH=:/sbin:/usr/sbin/$PATH - Install the packages and expect errors; don’t worry as we’re going to automagically fix them
dpkg -i *.deb - To magically fix package dependencies and make the new software work enter
apt install -fand install all suggested packages
What next?
You now know how to setup a basic meeting client appliance that can be setup without a keyboard or mouse attached. You can simply turn on the extra display, connect to it from your main meeting computer to join the remote display as a client with or without cameras and microphones for example: you can connect a big screen into a Zoom meeting you are hosting and put it into grid view so that everybody in the room can see who’s joining them. You can also have a system without a keyboard and mouse at a location in the room that has a camera, microphone and speaker attached so that people at the venue can walk up to the display and interact with their friends without affecting the main grid display. These systems appear in the meeting as connected users so it’s best to label them clearly.